


Browse sections
Add-ons
Turn on an add-on for your kind of business, such as Clinics, and choose the account mode and the section order for the dashboard and the mobile app.
On this page
Add-ons are tools for your kind of business, added to Hadir Chat. The first is Clinics: patient files and visits, today's appointments, and manual deposits with the clinic's own payment link. Each add-on stays off until you turn it on, and turning it off deletes nothing.
Two steps to turn one on
- Availability, in your account area at hadir.chat/app: whether the add-on is available to your workspace.
- Switching it on, in the inbox: an administrator turns it on, and it appears for the team.
The Clinics add-on is included in every plan at no extra charge, so it is already available to your workspace and you can go straight to the second step.
Check availability in the account area
- In the account area, open Settings, and on the Add-ons card select Manage add-ons.
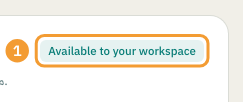
- Next to each add-on you see its state (1): Available to your workspace or Not enabled, and why, such as Included in your plan.
- If an Enable button shows for an add-on your plan does not include, only the workspace owner can use it.
Switch the add-on on in the inbox
- In the inbox, open Settings, then Add-ons. Administrators can open this page.
- Under Available add-ons, turn on the switch next to Clinics (1). You see "Add-on turned on", and Included in your plan (free) next to the name.
Choose the account mode
Under Account mode (2), choose Standard or Clinic; it is saved at once. In Clinic mode the clinic sections come first, Patients, then Today's appointments, then Conversations, and the other sections, Daily accounts among them, move under More.
Each team member can switch back to the normal view for themselves only: they click their picture at the bottom of the sidebar and choose Normal view (just me), and come back with Clinic mode.
Arrange the sections
- In the chosen mode you have two lists (3): Main tabs, shown in the sidebar and the mobile app in this order, and Under «More», grouped under one button.
- Drag the sections into order, or from one list to the other. Settings always stays last.
- Select Save (4) at the bottom of the page. Everyone on the account sees the same order. To go back to ours, select Default order.
Clinic settings
While the add-on is on, a Clinic settings section appears under it: the price and default deposit per appointment type, the payment-link template after 24 hours, and the visit fields and medical info. The same Save button saves them. Details in Deposits and payments and Visit fields and medical info.
Who sees what
Administrators see every clinic section. For the rest of the team, add the clinic permissions to their custom role, such as "Clinic: view the patients list" and "Clinic: view own appointments only". An agent without a custom role sees no clinic sections. The clinic's "doctors" are the agents assigned to appointment types.
Note: turned off, the add-on disappears from the dashboard and the account goes back to the standard mode, and everything recorded is kept. Turn it on again to find it as it was.
Thanks for your feedback ✓
We got your note and will review the article with it in mind.