


Browse sections
Add website chat
Create a chat channel for your website, paste one snippet, and visitors' messages reach your inbox.
Website chat is the quickest channel to start with, because it needs nobody's approval. You create the channel in the inbox, put a short snippet on your pages, and the chat window appears to your visitors while their messages reach your team.
Create the channel
- In the inbox, open Settings, then Inboxes, and select Add Inbox.
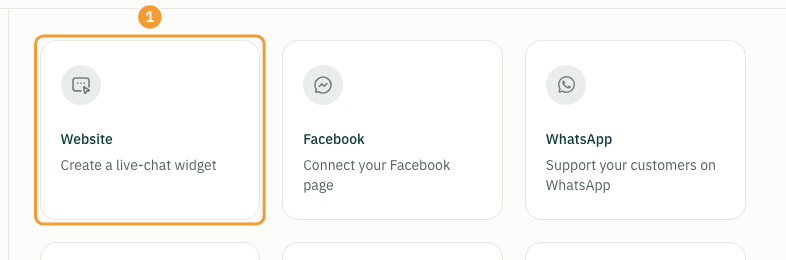
- Choose Website (1).
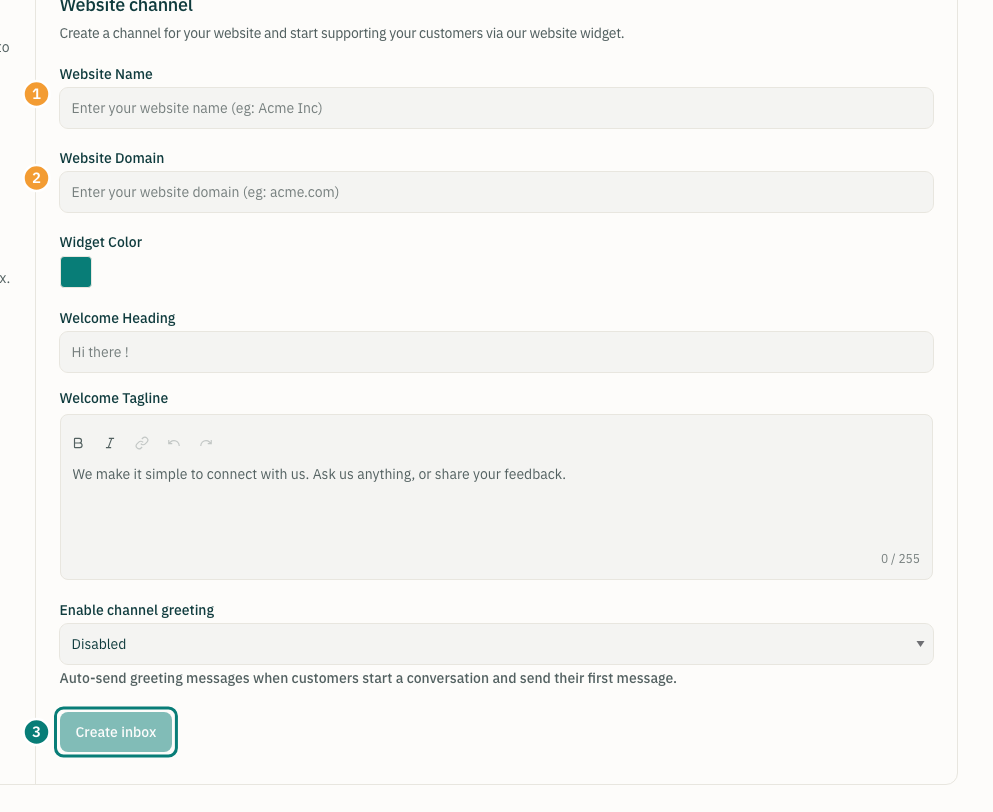
- Enter the Website Name (1), such as your store's name.
- Enter the Website Domain (2), such as
example.com. - If you like, change the Widget Color, the Welcome Heading and the Welcome Tagline. You can change all of them later.
- Select Create inbox (3).
- Pick the agents who answer website conversations, then select Add agents.
- You see Your Inbox is ready! with the snippet. Copy it.
Put the snippet on your site
- Paste the snippet into your site's template inside the
<body>tag, ideally just before</body>, so it appears on every page. - Open your site and reload the page. The chat button appears in a corner of the screen.
- Send a test message from your site; you will find it in the inbox under the new channel.
The snippet looks like this; the websiteToken is your channel's own:
<script>
  (function(d,t) {
    var BASE_URL="https://app.hadir.chat";
    ...
    window.hadirSDK.run({ websiteToken: '…', baseUrl: BASE_URL })
  })(document,"script");
</script>
If you need the snippet later
- Open Settings, then Inboxes, and select the settings button next to your website channel.
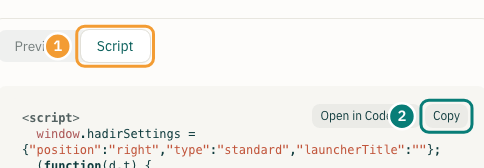
- On the General settings tab, select Script (1) above the preview, then Copy (2).
Note: to protect the channel, limit which sites may show the chat: open the Configuration tab, enter your domains in Allowed Domains separated by commas, then select Update. Left empty, any site can use the snippet.
Thanks for your feedback ✓
We got your note and will review the article with it in mind.